
🇵🇱 Instrukcja montażu i użytkowania
Wybierz swoją wersję trenażera: (🇬🇧 English version: jump to the English manual ↓)
Wersję rozpoznasz po kształcie gumowych stóp trenażera: v1 ma okrągłe stopy, v2 ma podłużne stopy w kształcie fasolki (jak podłużny otwór pod śrubę).
➜ Wahoo KICKR Core v1 (okrągłe stopy): RockerFeet nasuwa się na gumowe stopy trenażera, bez narzędzi.
➜ Wahoo KICKR Core v2 (stopy w kształcie fasolki): najpierw odkręcasz gumowe stopy trenażera (imbus 3 mm).
Zanim zaczniesz
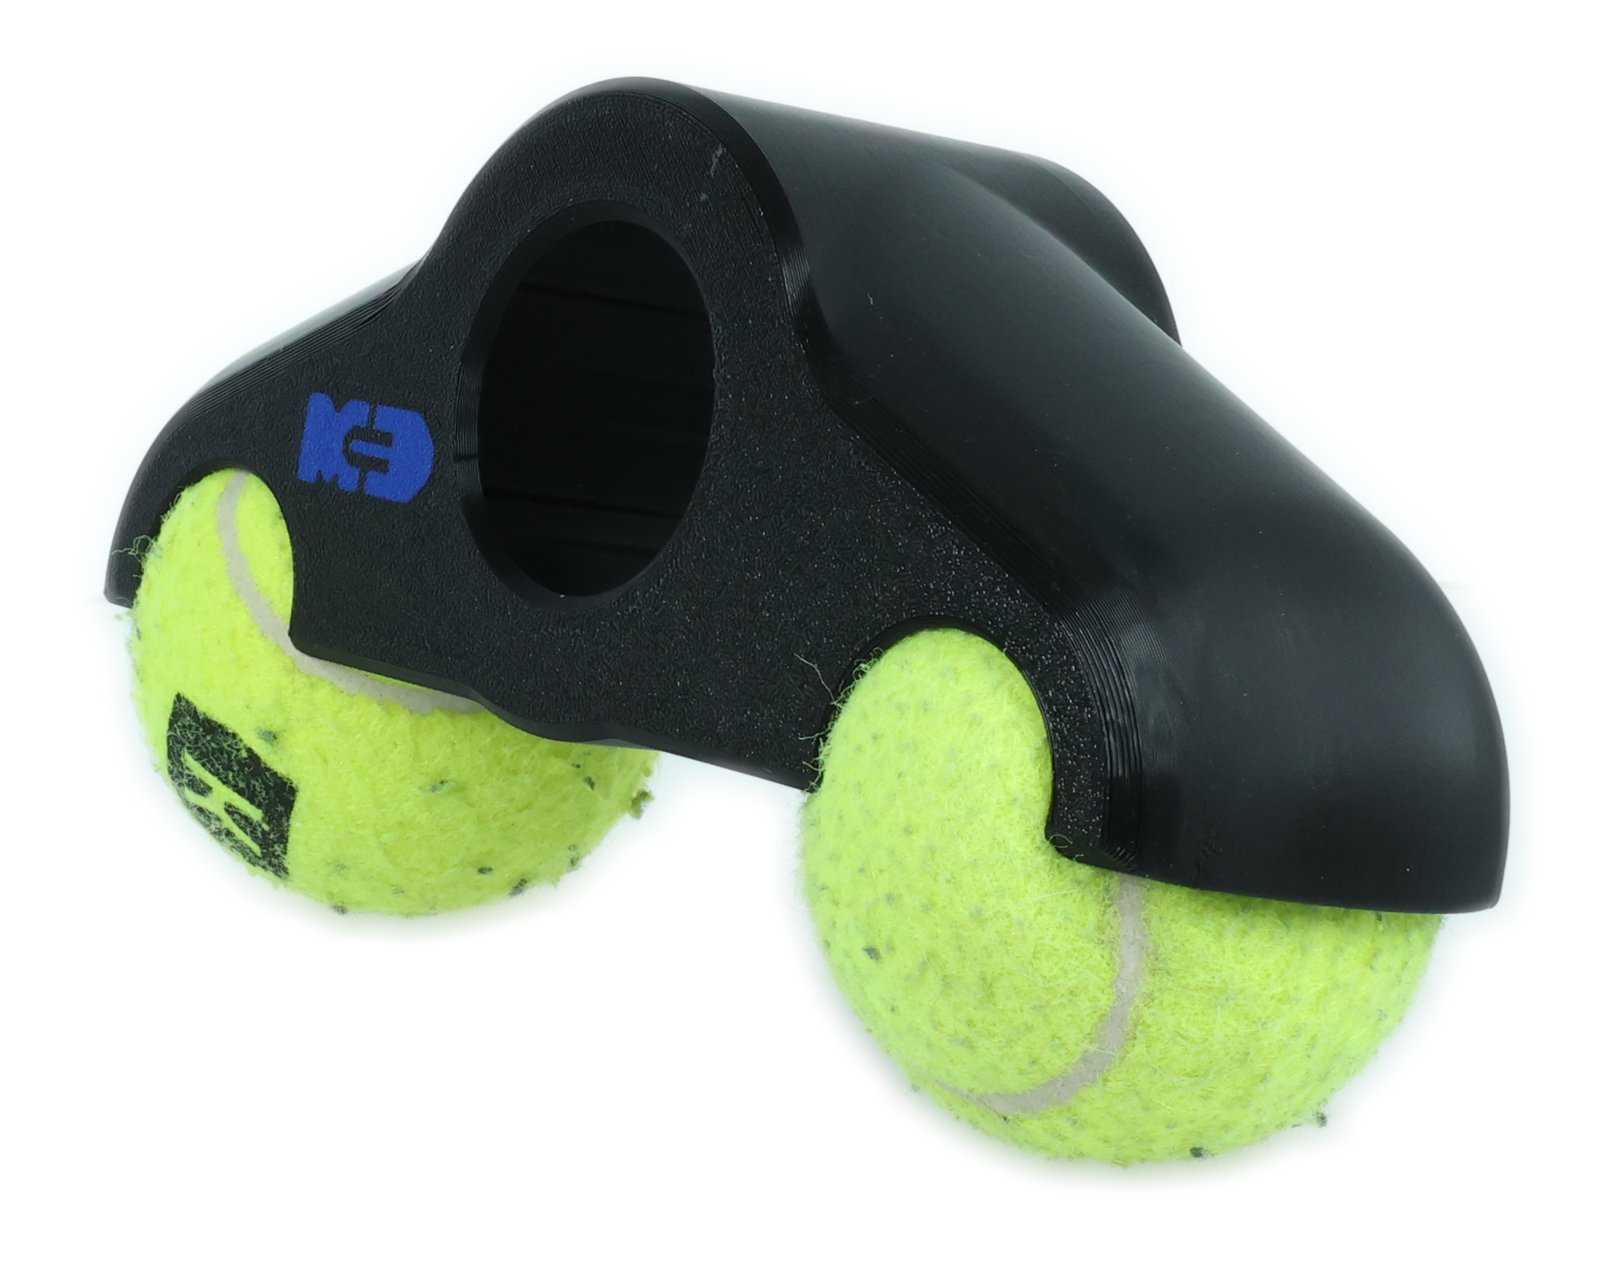
RockerFeet to wahliwe stopy do trenażera Wahoo KICKR Core. Pozwalają trenażerowi lekko kołysać się na boki, co zwiększa realizm jazdy i komfort treningu.
Wcześniejsze egzemplarze były sprzedawane jako „Stopa trenażera Wahoo Kickr Core” z instrukcją „Rocker Feet do Wahoo Kickr Core”. To ten sam produkt, zmieniła się tylko nazwa.
Bezpieczeństwo:
- RockerFeet celowo wprowadzają lekki ruch boczny trenażera, podobny do zachowania roweru na drodze. Zbyt duży przechył może spowodować utratę równowagi.
- Zacznij od krótszych sesji i stopniowo przyzwyczajaj się do nowego zakresu ruchu.
- Nie używaj RockerFeet, jeśli którykolwiek element jest pęknięty lub uszkodzony.
Zawartość zestawu
- 4 adaptery RockerFeet z wytrzymałego tworzywa sztucznego, po jednym na każdą stopę trenażera
- Piłki tenisowe jako elementy sprężyste, 8 szt., po 2 w każdym adapterze
Upewnij się, że masz wersję RockerFeet pasującą do swojego trenażera. Adaptery do KICKR Core v1 i v2 nie są zamienne.
Montaż: Wahoo KICKR Core v1
Narzędzia nie są potrzebne. Montaż zajmuje mniej niż minutę.
Przyda się:
- Opcjonalnie: woda z mydłem lub inny środek poślizgowy (np. WD-40)
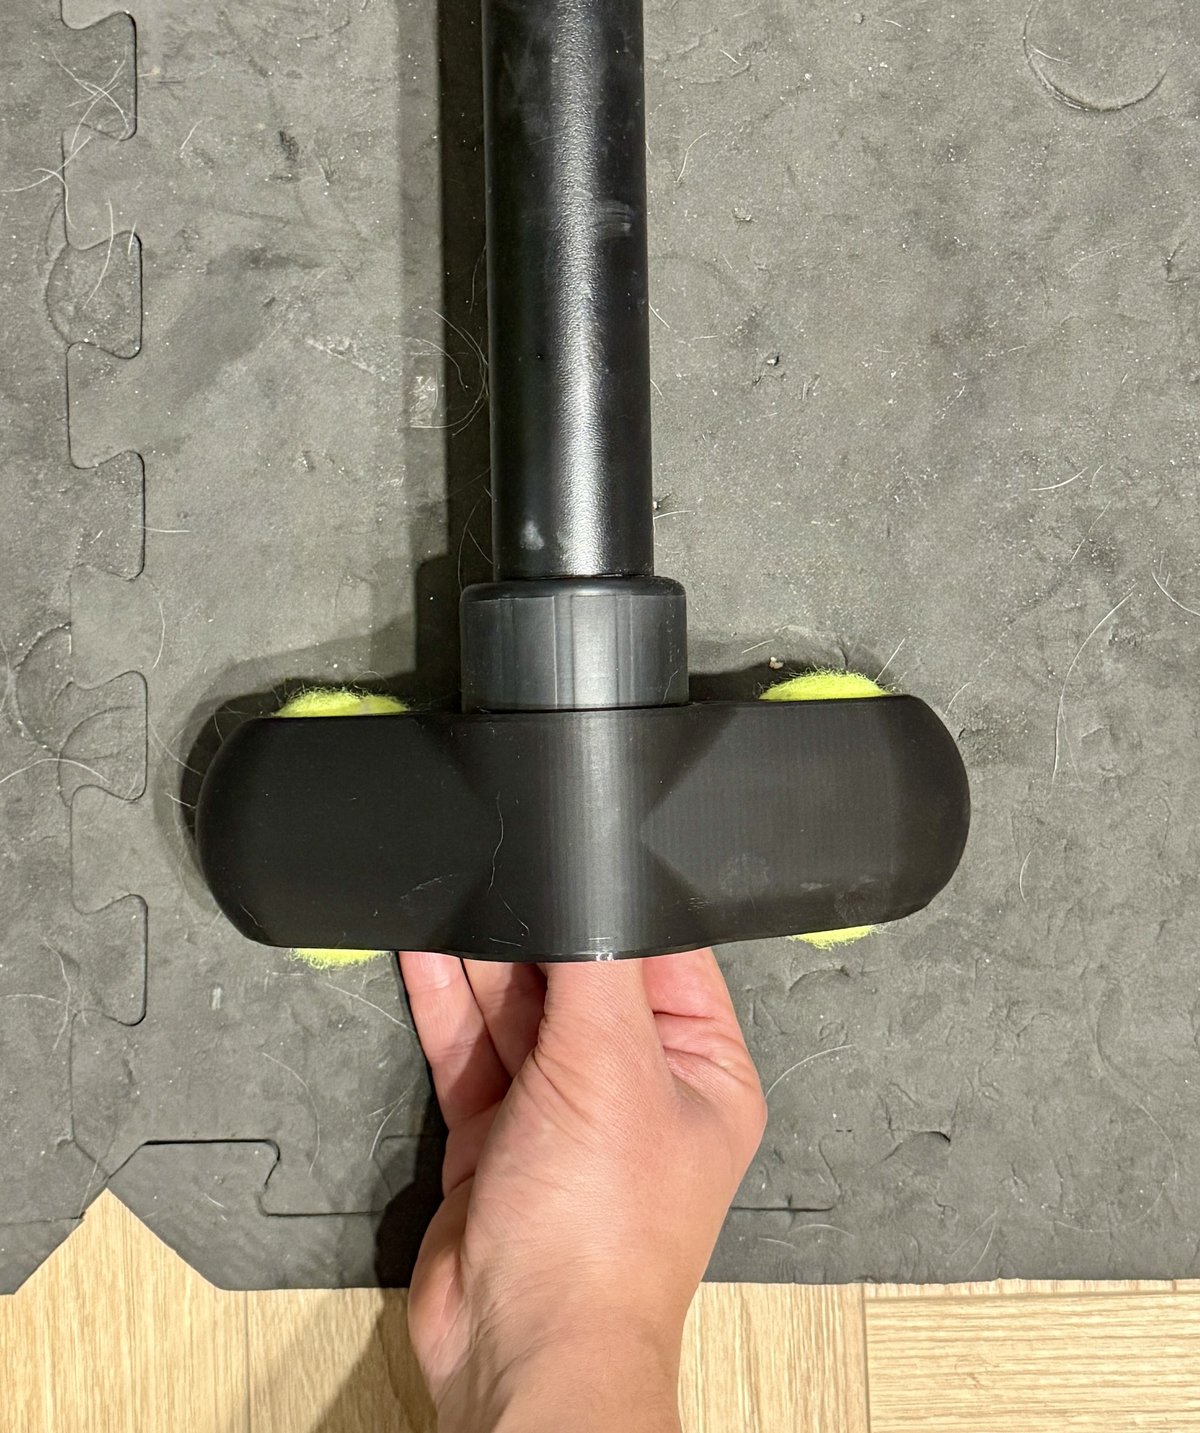
1. Nasuń RockerFeet na stopę trenażera
- Nasuń RockerFeet na gumową stopę trenażera. Może to wymagać użycia większej siły.
- Jeśli element nie chce wejść, użyj odrobiny wody z mydłem albo innego środka poślizgowego (np. WD-40).
2. Sprawdź, czy RockerFeet siedzi poprawnie
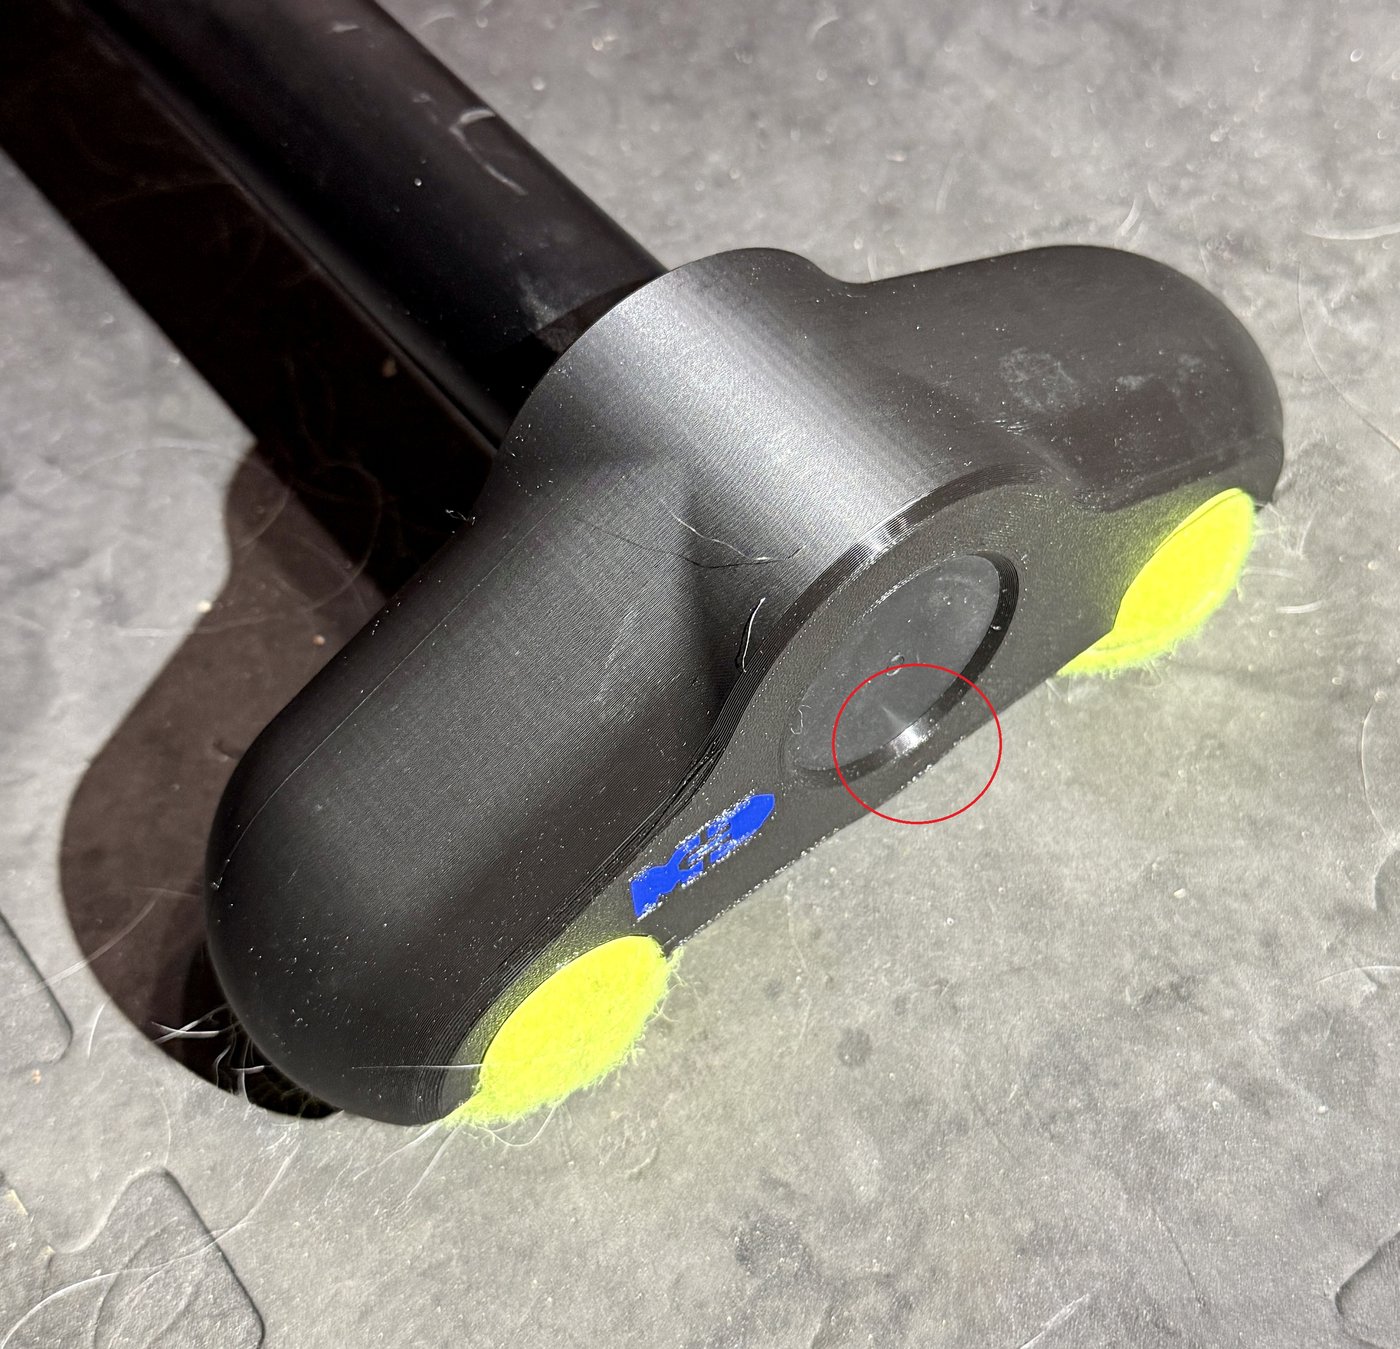
Gdy RockerFeet jest poprawnie zamontowany, w miejscu zaznaczonym na czerwono widać, że jego dolna część styka się z gumową stopą trenażera.
Powtórz kroki 1-2 dla pozostałych trzech stóp trenażera.
Montaż: Wahoo KICKR Core v2
Potrzebne narzędzia:
- Klucz imbusowy 3 mm
- Opcjonalnie: gumowy młotek (albo zwykły młotek i drewniana podkładka)
- Opcjonalnie: woda z mydłem lub inny środek poślizgowy (np. WD-40)
1. Zdejmij gumową stopę trenażera
- Połóż trenażer na boku, żeby mieć łatwy dostęp do stóp.
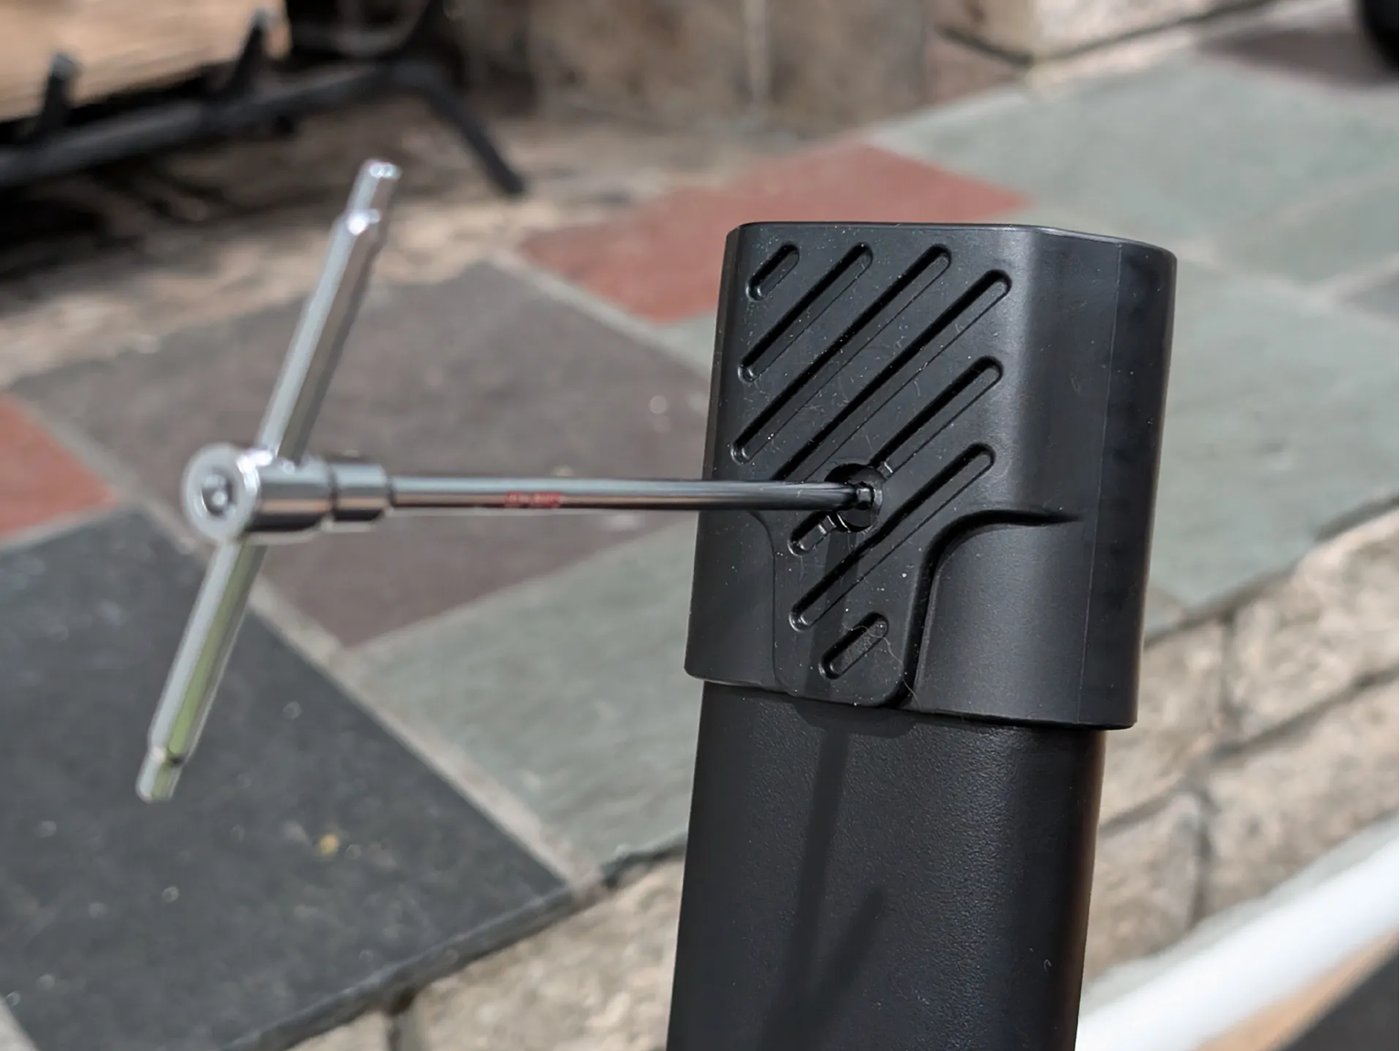
- Odkręć widoczną śrubę kluczem imbusowym 3 mm. Odłóż śrubę w bezpieczne miejsce, przyda się w kroku 2.
- Zdejmij gumową stopę trenażera.
2. Nasuń RockerFeet i przykręć śrubę
- Nasuń RockerFeet na stopę trenażera. Może to wymagać użycia większej siły.
- Jeśli element nie chce wejść, użyj odrobiny wody z mydłem albo innego środka poślizgowego (np. WD-40).
- Możesz delikatnie dobić RockerFeet na miejsce gumowym młotkiem albo młotkiem przez drewnianą podkładkę.
- Wkręć śrubę odkręconą w kroku 1 i dokręć ją lekko, maksymalnie 3 Nm.
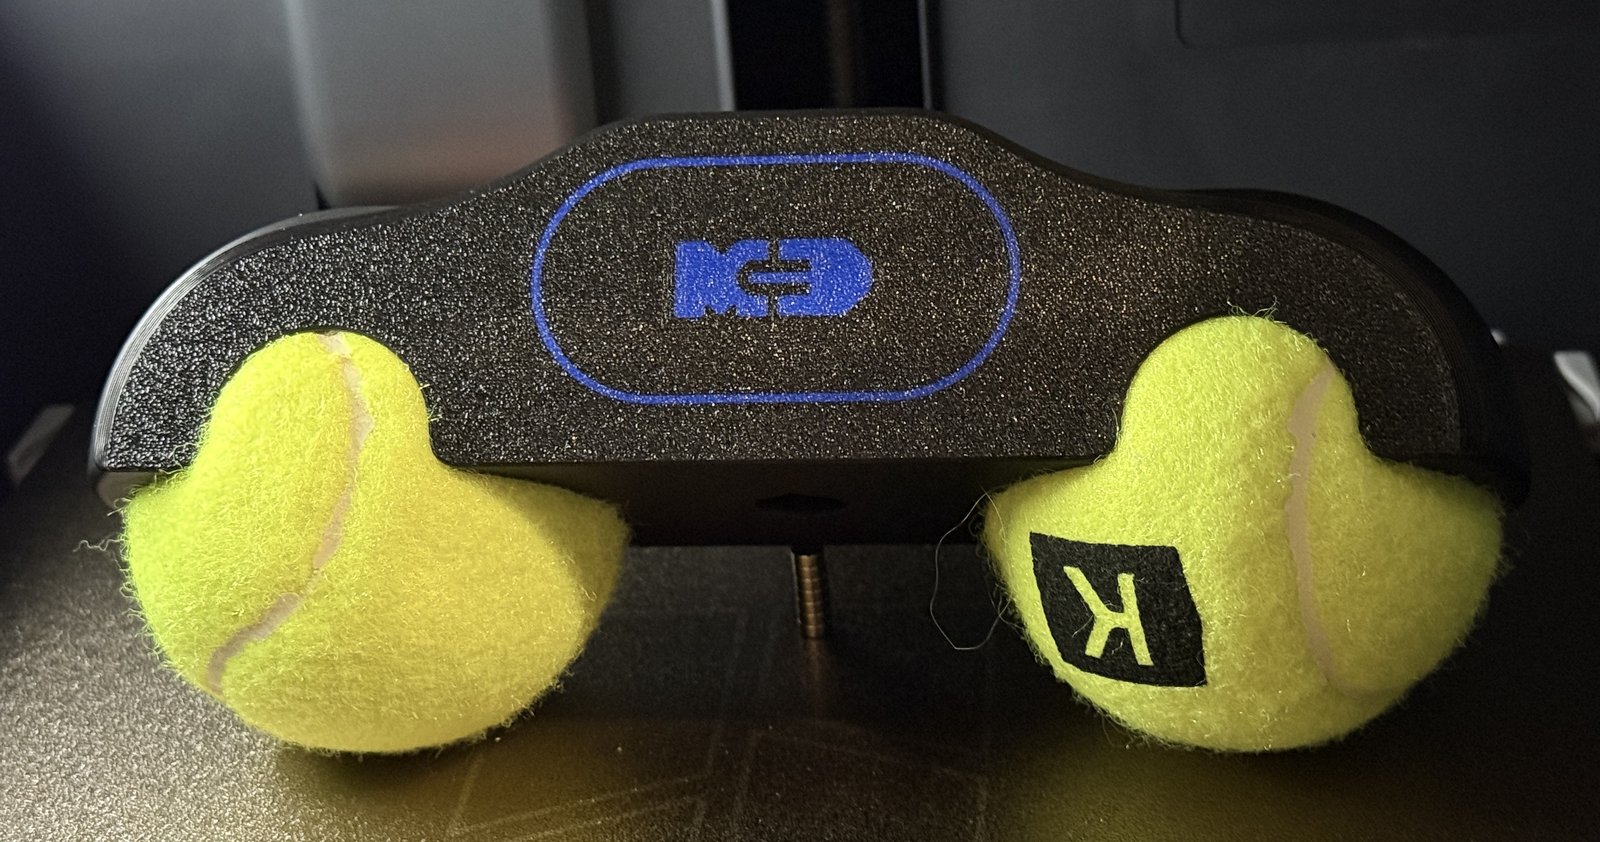
Powtórz kroki 1-2 dla pozostałych trzech stóp trenażera.
Wysokość przedniego koła
Po zamontowaniu RockerFeet oś trenażera podnosi się o około 33 mm. W KICKR Core (v1 i v2) daje to wysokość osi około 365 mm, mierzoną od podłoża do środka osi koła.
Żeby rower stał poziomo, podłóż coś pod przednie koło. Tabela podaje, ile, w zależności od szerokości opony 700C:
| Opona 700C (mm) | Wysokość osi przedniego koła (mm) | Ile podłożyć pod koło (mm) |
|---|---|---|
| 23 | 334 | 31 |
| 25 | 336 | 29 |
| 28 | 339 | 26 |
| 30 | 341 | 24 |
| 32 | 343 | 22 |
| 35 | 346 | 19 |
| 38 | 349 | 16 |
| 40 | 351 | 14 |
| 42 | 353 | 12 |
| 45 | 356 | 9 |
| 47 | 358 | 7 |
| 50 | 361 | 4 |
| 55 | 366 | −1 |
Wartości są przybliżone i zmierzone bez obciążenia (sam rower na trenażerze). Mogą się różnić w zależności od podłoża, masy roweru i masy kolarza. Przy oponach szerszych niż ok. 50 mm podkładka nie jest potrzebna, bo przednia oś i tak jest na wysokości osi trenażera lub wyżej.
Zamiast podkładki możesz użyć nogi TrainerLeg, która zastępuje przednie koło i ma regulowaną wysokość osi. Została zaprojektowana jako uzupełnienie RockerFeet.
Kontakt i podmiot odpowiedzialny
W razie problemów napisz na adres kontakt@mcdziakdesign.pl.
Producent i podmiot odpowiedzialny:
McDziak Design Marcin Magdziak
ul. Poematu 8/76, 04-993 Warszawa, Polska
NIP: 9522264441
Udanej jazdy! Ride on!
🇬🇧 Installation and user manual
Choose your trainer version:
You can tell them apart by the shape of the trainer’s rubber feet: v1 has round feet, v2 has elongated, bean-shaped feet (like a slotted bolt hole).
➜ Wahoo KICKR Core v1 (round feet): RockerFeet slide onto the trainer’s rubber feet, no tools needed.
➜ Wahoo KICKR Core v2 (bean-shaped feet): you first unscrew the trainer’s rubber feet (3 mm hex key).
Before you start
RockerFeet are rocker feet for the Wahoo KICKR Core trainer. They let the trainer sway gently from side to side, making the ride more realistic and training more comfortable.
Earlier units were sold as “Stopa trenażera Wahoo Kickr Core” (Wahoo Kickr Core trainer foot) with the manual “Rocker Feet do Wahoo Kickr Core”. It is the same product, only the name has changed.
Safety:
- RockerFeet deliberately add slight side-to-side movement to the trainer, similar to how a bike behaves on the road. Leaning too far can make you lose your balance.
- Start with shorter sessions and get used to the new range of motion gradually.
- Do not use RockerFeet if any part is cracked or damaged.
What’s in the box
- 4 RockerFeet adapters made of durable plastic, one for each trainer foot
- Tennis balls acting as springs, 8 pcs, 2 in each adapter
Make sure your RockerFeet match your trainer. The KICKR Core v1 and v2 adapters are not interchangeable.
Installation: Wahoo KICKR Core v1
No tools needed. Installation takes less than a minute.
Useful to have:
- Optional: soapy water or another lubricant (e.g. WD-40)
1. Slide RockerFeet onto the trainer foot
- Slide RockerFeet onto the trainer’s rubber foot. This may take some force.
- If it won’t go on, use a little soapy water or another lubricant (e.g. WD-40).
2. Check that RockerFeet are seated correctly
When RockerFeet are fitted correctly, you can see at the spot circled in red that their lower part touches the trainer’s rubber foot.
Repeat steps 1-2 for the other three trainer feet.
Installation: Wahoo KICKR Core v2
Tools you need:
- 3 mm hex key
- Optional: rubber mallet (or a regular hammer and a wooden block)
- Optional: soapy water or another lubricant (e.g. WD-40)
1. Remove the trainer’s rubber foot
- Lay the trainer on its side so you can easily reach the feet.
- Undo the visible bolt with a 3 mm hex key. Put the bolt somewhere safe, you will need it in step 2.
- Remove the trainer’s rubber foot.
2. Slide on RockerFeet and refit the bolt
- Slide RockerFeet onto the trainer foot. This may take some force.
- If it won’t go on, use a little soapy water or another lubricant (e.g. WD-40).
- You can gently tap RockerFeet into place with a rubber mallet, or with a hammer over a wooden block.
- Screw in the bolt removed in step 1 and tighten it lightly, 3 Nm maximum.
Repeat steps 1-2 for the other three trainer feet.
Front wheel height
With RockerFeet fitted, the trainer axle rises by about 33 mm. On the KICKR Core (v1 and v2) this puts the axle at about 365 mm, measured from the floor to the centre of the wheel axle.
To keep the bike level, put a riser block under the front wheel. The table shows how high it should be for each 700C tyre width:
| 700C tyre (mm) | Front axle height (mm) | Riser under the wheel (mm) |
|---|---|---|
| 23 | 334 | 31 |
| 25 | 336 | 29 |
| 28 | 339 | 26 |
| 30 | 341 | 24 |
| 32 | 343 | 22 |
| 35 | 346 | 19 |
| 38 | 349 | 16 |
| 40 | 351 | 14 |
| 42 | 353 | 12 |
| 45 | 356 | 9 |
| 47 | 358 | 7 |
| 50 | 361 | 4 |
| 55 | 366 | −1 |
Values are approximate and measured without load (just the bike on the trainer). They can vary with the floor surface, bike weight and rider weight. With tyres wider than about 50 mm you don’t need a riser, because the front axle is already level with the trainer axle or higher.
Instead of a riser block you can use TrainerLeg, which replaces the front wheel and has an adjustable axle height. It was designed to go with RockerFeet.
Contact and responsible party
If you have any problems, email kontakt@mcdziakdesign.pl.
Manufacturer and responsible party:
McDziak Design Marcin Magdziak
ul. Poematu 8/76, 04-993 Warszawa, Poland
NIP (tax ID): 9522264441
Enjoy your ride! Ride on!